The complete DTF printing process
From the moment your file lands in our NY facility to the moment your transfer is ready to press — here's exactly what happens, step by step.
-
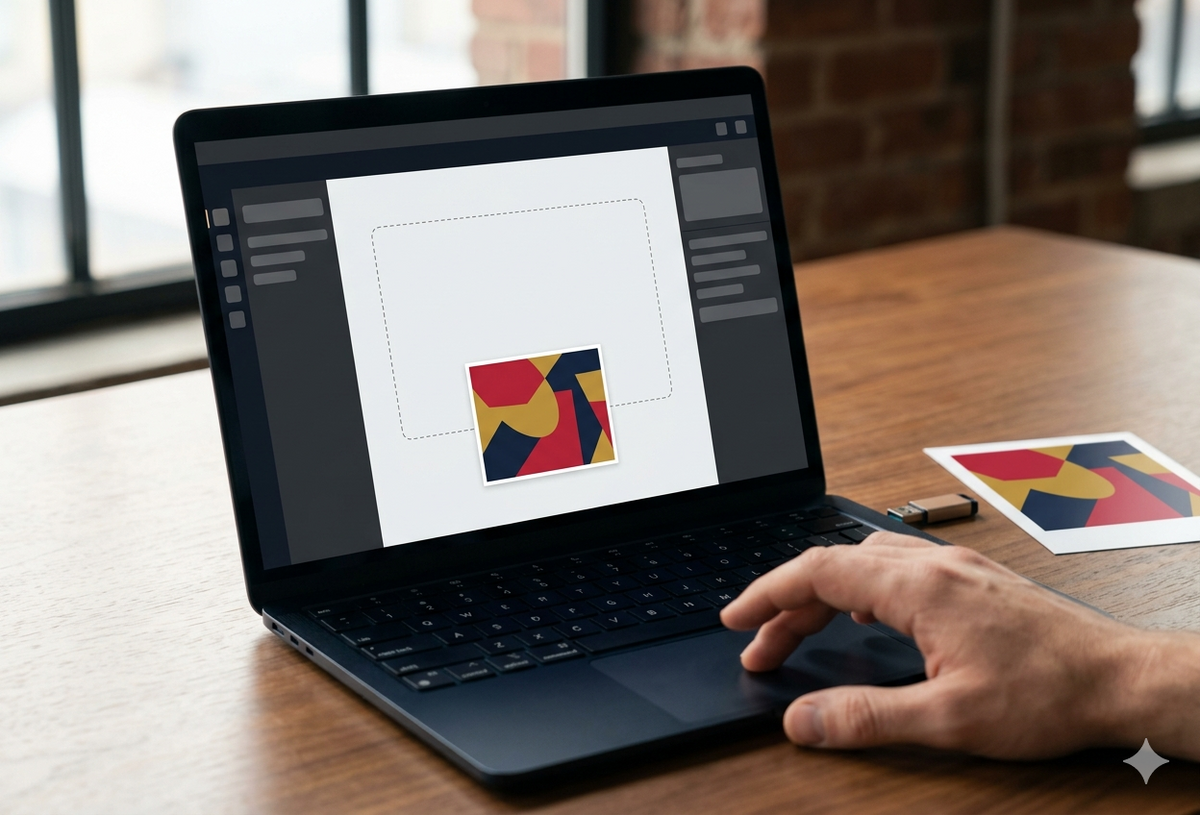 01UPLOAD
Send us your artwork
Upload your design through our order form or send it directly to our team. We accept PNG (with transparent background preferred), PDF, and high-resolution JPEG files. For the sharpest, most durable prints, we recommend 300 DPI at the final print size — but our pre-press team will check every file and reach out if anything needs adjustment.
No minimums, no setup fees. Single designs or hundreds at once, same per-unit pricing.
Technical specs
- File format File format: PNG, PDF, JPEG
- Min DPI Min DPI: 300
- Max size Max size: 22" wide × any length
- Color mode Color mode: RGB or CMYK
- File size File size: Up to 100MB
Pro tipFor the brightest whites on dark garments, save your PNG with a fully transparent background — our white-ink underbase needs the transparency to know where to print.
-
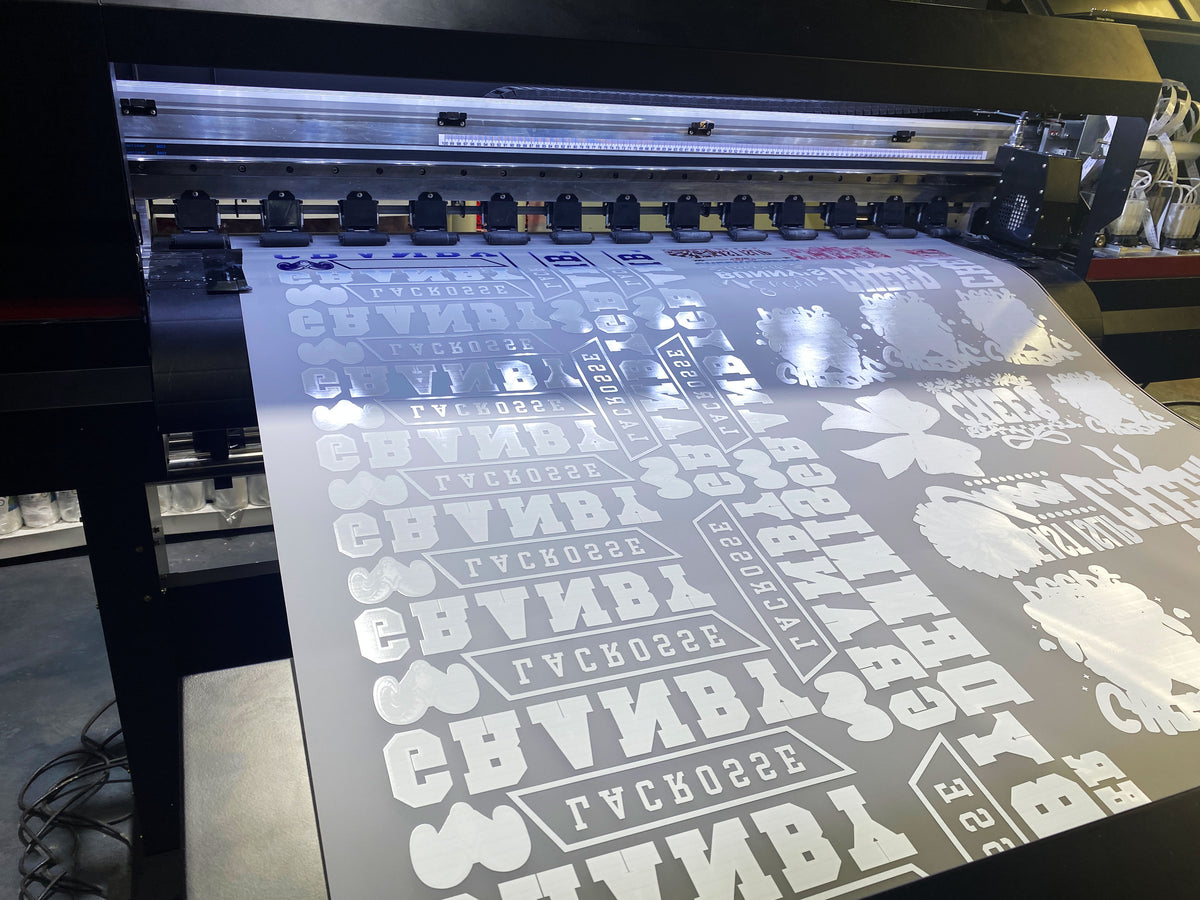 02PRINT
Premium printing in our NY facility
Your design gets printed on premium PET (polyethylene terephthalate) film using a 1200 dpi DTF printer with CMYK + dedicated white ink for vivid color on any garment color. Same-day printing when ordered before 1pm ET, Monday through Friday — straight from our NY facility.
Technical specs
- Resolution Resolution: 1200 dpi
- Ink system Ink system: CMYK + White underbase
- Film Film: 75-micron premium PET
- Drying Drying: Heat-set instantly
- Turnaround Turnaround: Same day (1pm ET cutoff)
Pro tipSame-day means your order leaves our shop the same business day — most NY pickups happen within 2 hours of ordering.
-
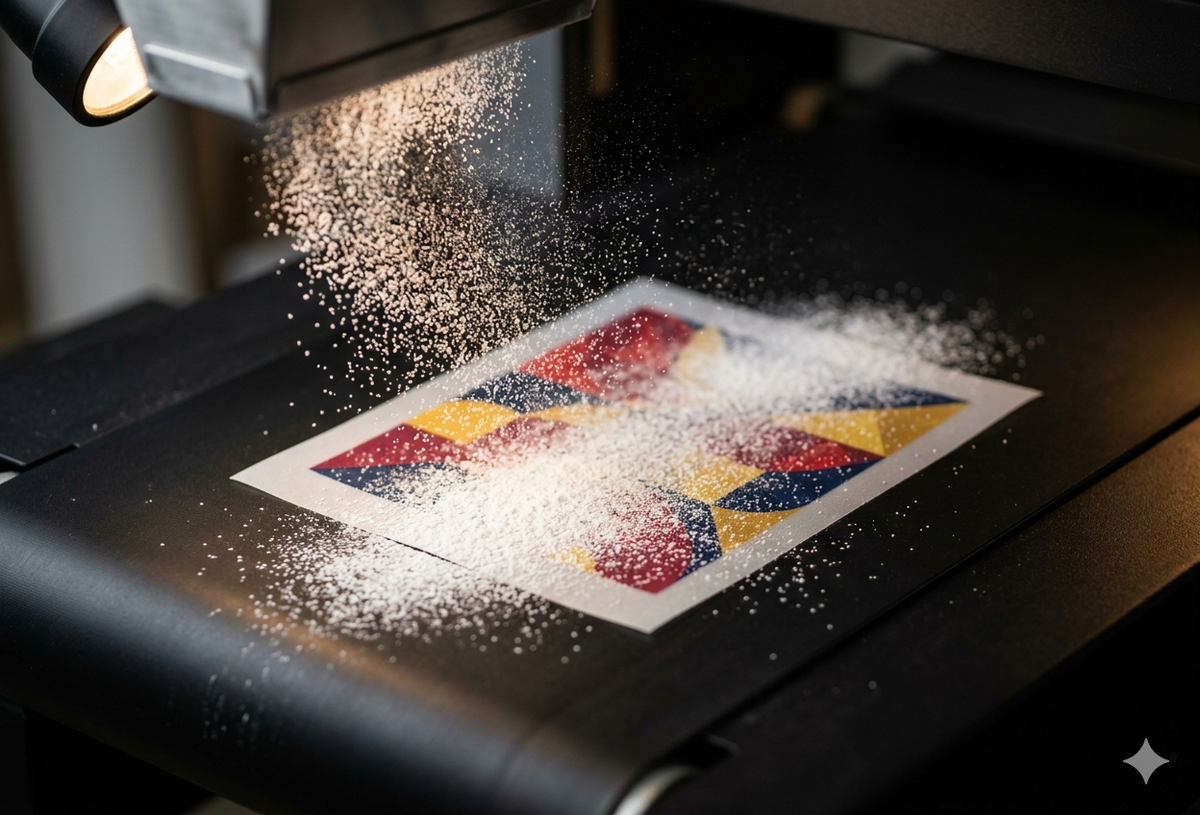 03POWDER
Adhesive powder application
After printing, while the ink is still wet, we apply a fine hot-melt adhesive powder evenly across the entire printed design. This powder is what makes the transfer bond permanently to fabric when you press it. Excess powder is automatically vacuumed off before the curing stage.
Technical specs
- Powder type Powder type: TPU hot-melt adhesive
- Grain size Grain size: 80-200 microns
- Application Application: Automated even coat
- Excess removal Excess removal: Vacuum reclaim
-
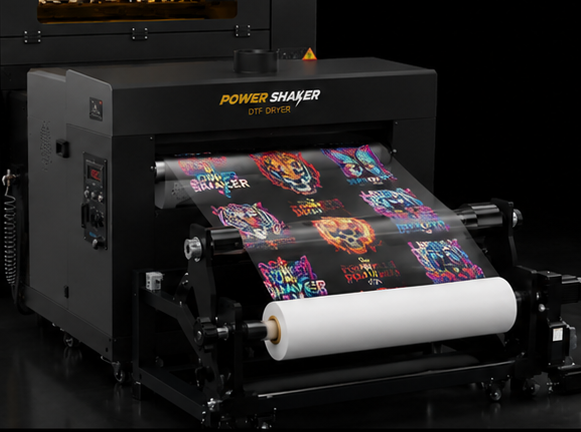 04CURE
Curing the film
The powdered film travels through our curing oven where the adhesive is heat-activated and bonded to the printed ink. Once cured, the transfer is shelf-stable for over a year if stored at room temperature in a dry place — meaning you can stockpile transfers and press them whenever you're ready.
Technical specs
- Cure temperature Cure temperature: 320°F (160°C)
- Cure time Cure time: 2-3 minutes
- Shelf life Shelf life: 12+ months unopened
- Storage Storage: Room temperature, dry
-
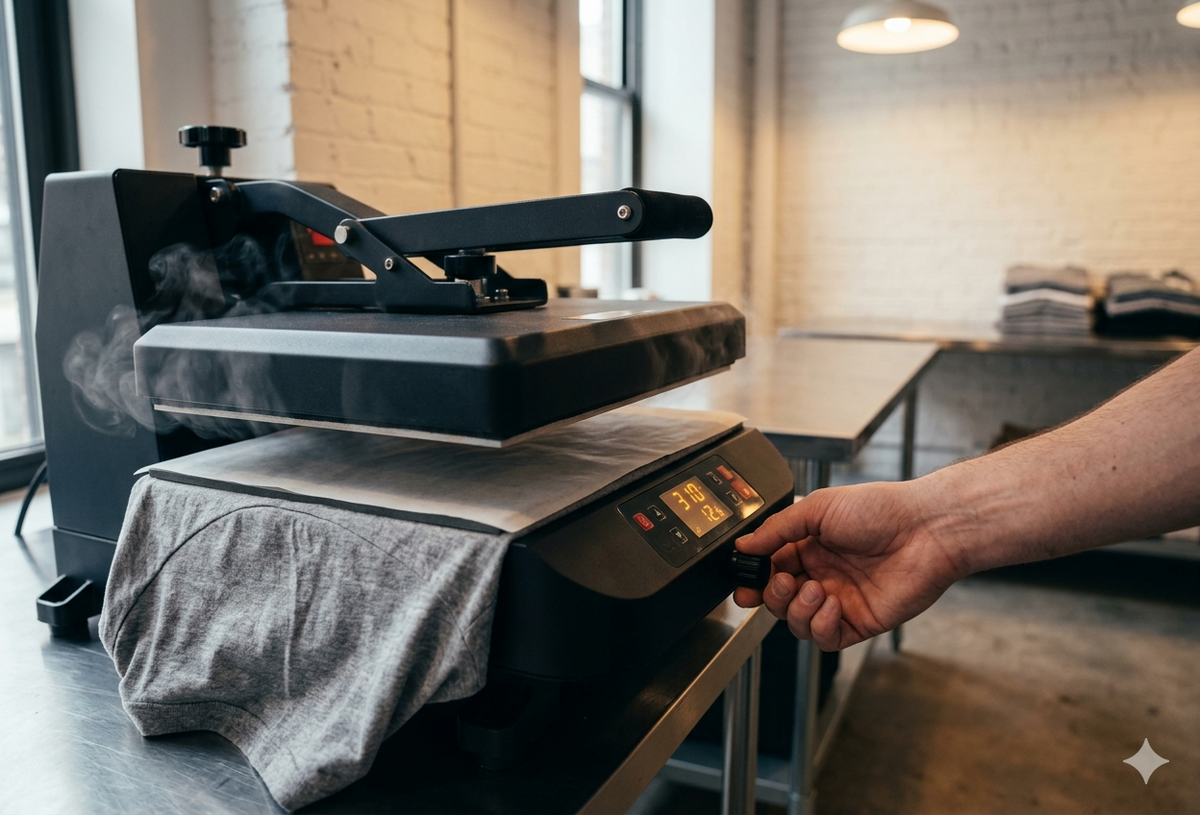 05PRESS
Press onto any fabric
Place your DTF transfer face-up on the garment, cover with parchment or a Teflon sheet, and press with a heat press at 310°F (155°C) for 12–15 seconds with firm, even pressure. Let the film cool completely before peeling — this is what we call a 'cold peel'. The result is a soft, flexible, full-color print that bonds permanently to the fabric.
Technical specs
- Press temp Press temp: 310°F (155°C)
- Press time Press time: 12-15 seconds
- Pressure Pressure: Firm and even
- Peel Peel: Cold peel (let fully cool)
- Final press Final press: 5 seconds with parchment (optional but recommended)
Pro tipAn optional final press of 5 seconds with parchment on top after the cold peel makes the transfer extra smooth and improves wash durability.
-
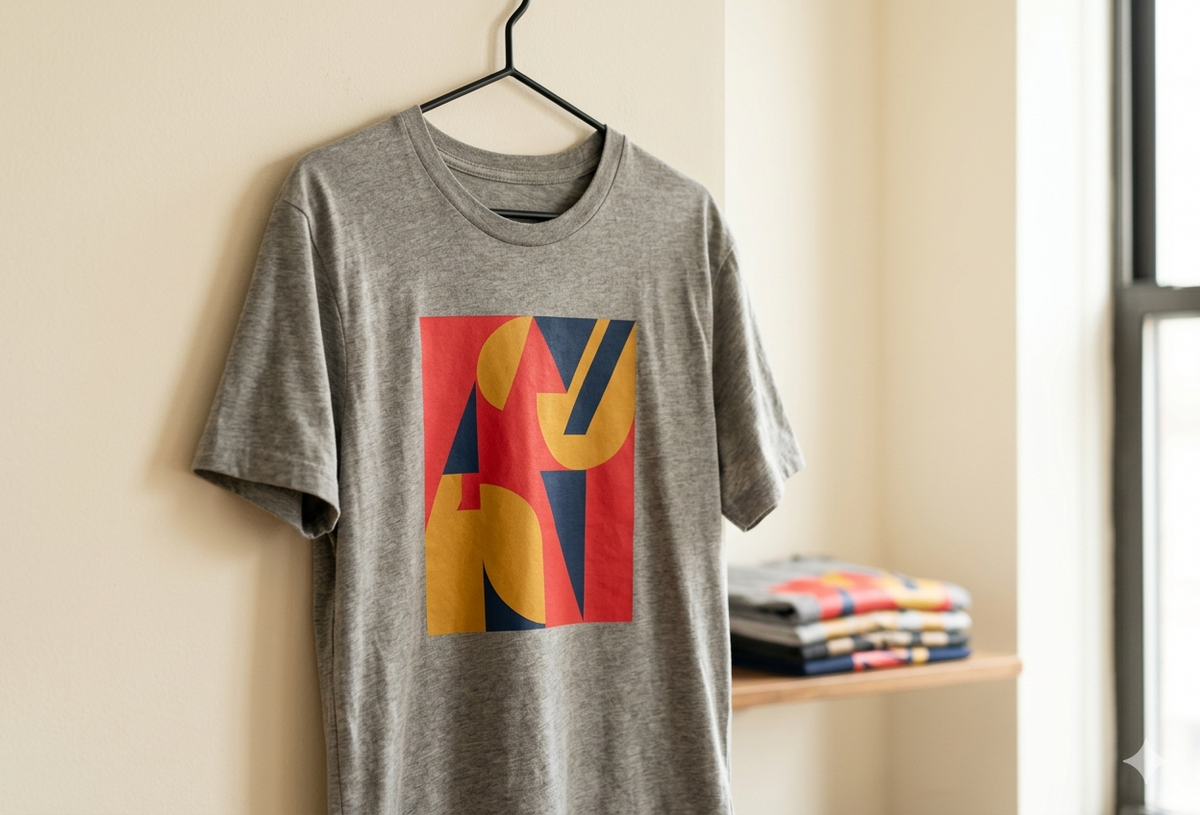 06WEAR
Wash, wear, repeat
That's it — your garment is ready to wear and wash. DTF prints are lab-tested for 100+ wash cycles when pressed correctly, with no cracking, peeling, or fading. Turn the garment inside out and wash cold for the longest life. Tumble dry low or hang dry. Skip the iron over the printed area.
Technical specs
- Wash durability Wash durability: 100+ cycles
- Wash temp Wash temp: Cold (turn inside out)
- Dry Dry: Tumble low or hang
- Iron Iron: Avoid printed area
Pro tipFor the longest print life, wait 24 hours after pressing before the first wash — this gives the adhesive time to fully cure into the fabric fibers.


